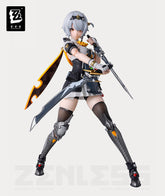
Uncovering the Fundamental Mechanics of ZZZ Team Building!
Curious what part Proxies value most in game guides? If asked, I'd say character guides prioritize mechanics, rotations, and combat nuances. After all, as primary damage dealers, main DPS rely on execution above all. Supports focus more on stat scaling and buildcraft-they flex into any team comp, while stacking two main DPS rarely works.
But every squad must field three Agents plus one Bangboo. So instead of skimping on team-building explanations repeatedly, let's dedicate this full guide to demystifying it. I'll clarify optimal team assembly with concise key points, ensuring you can instantly recognize compatible teammates whenever you pull a character. Let's get started!

1. Core Principles of Team Building in Zenless Zone Zero
Choosing team comps is essentially choosing playstyles. Take Miyabi: her mechanics involve triggering Anomaly to gain "Fallen Frost," but during Frostburn state she cannot stack Anomaly-though the next Anomaly clears this state. This design clearly encourages players to deal Anomaly damage. Thus, you can directly slot Piper and Lucy into her team. After Miyabi applies Frostburn, follow with Piper's skill to trigger Anomaly, meanwhile supplementing with Lucy's buffs. This forms Miyabi's most straightforward team and rotation.
Personally, I prefer using Miyabi as an Attack role. Her Fallen Frost can be gained not just via Anomaly, but also through enhanced special skills. Based on my experience, even without Energy Regeneration stats on Drive Disc slot 6, her on-field Basic Attack generates ample energy.
Zhu Yuan exemplifies a classic burst DPS. At launch, Qingyi + Zhu Yuan defined the quintessential Daze burst comp-but this doesn't mean Zhu Yuan can't sustain on-field play. If desired, pairing her with Astra Yao and Nicole for a dual-Support build enables on-field Zhu Yuan playstyles.

Then there's Evelyn: You can field her with two Supports for on-field action, but since her damage concentrates on resource-consuming Chain Attacks, you can also slot Stun characters to unleash five or even six Chain Attacks during enemy Daze windows.
2. How to Choose Teammates in Zenless Zone Zero?
To summarize: Team building in Zenless Zone Zero boils down to the "DPS + Support" principle. Learning a single character's mechanics is straightforward, but selecting the remaining two slots from your entire box requires understanding all your owned characters to form optimal teams.
Explaining team comps in one article would mean explaining every character's mechanics-is that feasible? Detailed breakdowns per character are impossible, but describing Support roles' core traits in one sentence is achievable if we exclude Attack/sustained-field DPS.

Next, I'll classify them by roles and share practical insights to help you instantly grasp all current "Support" mechanics after reading just this guide.
3. Support Agents & Multiplier Zones & DEF Multiplier Zone in ZZZ
There are five Support Agents: Astra Yao, Rina, Lucy, Nicole, and Soukaku. But before diving in, let's address "Multiplier Zones."
Damage output multiplies values from several multiplier zones-Attack, Skill Ratio, DMG Bonus, Vulnerability, etc. Why care? Suppose a game has five multiplier zones, each with a 1.0 base value. Adding a 0.5 boost entirely to one zone yields 1.5× damage. But distributing 0.3 to one zone and 0.2 to another gives 1.56×. Spreading 0.1 to each zone results in 1.61×.
This shows: Distributing buffs evenly across multiplier zones maximizes damage. Conversely, stacking buffs on one zone causes diminishing returns ("dilution"). Main DPS typically focus on Skill Ratio, CRIT, or ATK/DMG Bonus zones, while Supports dominate the ATK zone. That's why Miyabi + Astra Yao + Nicole dominates: pairing the strongest DPS with the top ATK buffer and top DEF Reduction support introduces a new DEF Multiplier Zone.
So why explain multiplier zones? First, it's core to team building-like spreading buffs across zones in the Miyabi/Astra/Nicole comp. Second, buffs aren't just character-based; W-Engine and Drive Disc choices also affect multiplier zones, which we'll explore separately.

Now let's formally introduce the agents:
Astra Yao and Lucy both provide ATK buffs via their enhanced special skills. The difference is: Lucy offers only 600 ATK, but her buffs are easily triggered-not just by enhanced specials, but also by chain attacks and ultimates. Additionally, Lucy's own enhanced special and ultimate have high damage multipliers. At max Mindscape stacks, she deals substantial off-field damage, and teammates can extend buff duration by using their own enhanced specials. Thus, despite weaker buffs, Lucy compensates with wide coverage, easy activation, and personal damage.

In contrast, Astra Yao deals almost no damage, but her 1,200 ATK boost + permanent 20% DMG Bonus and 25% CRT DMG make her the strongest buffer. Beyond buffs, she lets teammates frequently trigger Quick Assists, maintaining aggression while syncing with character mechanics. After her ultimate, the next two Quick Assists become Chain Attacks-this enables Evelyn's six Chain Attacks during one Daze. Crucially, Astra Yao doesn't return off-field when switched during Melody state, and since Quick Assists require off-field responses, you'll never manually switch to her. Even if switched to, she automatically uses her special skill and answers Quick Assists-meaning mis-switches can be corrected instantly.

This effectively reduces team control to two characters, significantly lowering difficulty (mobile players will appreciate this). Hence, Astra Yao and Lucy are currently the game's most versatile supports. When unsure who to bring, choose either.
Rina and Nicole are the only agents providing DEF Reduction (PEN) buffs. Thanks to the independent multiplier zone, their value exceeds other supports. However, compared to Astra/Lucy's 30s ATK buffs, Nicole's DEF Reduction lasts only 6-7s-barely enough for bursts, and some agents can't finish rotations in time. Nicole also has the strongest grouping among supports, with wide range, long targeting, and high multipliers.

Rina's buffs last slightly longer (~10s based on player data) and require no energy-just activate her buff with on-field basic attacks. Her PEN shares the same multiplier zone with Nicole's DEF Reduction. As covered earlier, spreading buffs across zones maximizes damage, but the DEF Multiplier Zone is unique: choose either PEN or DEF Reduction-combining both reduces returns.
Soukaku has the most complex setup: must accumulate three "Vortex" stacks for buffs. Still, 1,000 ATK + 20% Ice DMG bonus with 30s duration suits sustained DPS like Ellen perfectly

4. Zenless Zone Zero Stun Agents
There are currently five Stun Agents, plus Ju Fufu who will be added next version, making seven total. As discussed, Daze Vulnerability belongs to an independent multiplier zone. Thus, Stun Agents essentially function as supports with the most complex setups but guarantee 50% independent multiplier zone value and safe DPS windows. Anby, the only A-Rank Stun Agent, offers zero buffs aside from Drive Disc options.
Koleda specializes in Stun but lacks team buffs-though not entirely. Her enhanced special lets her perform one empowered basic attack, increasing Chain Attack damage by 70% during Daze. However, since only Evelyn deals meaningful damage via Chain Attacks, this feels slightly awkward. Still, Koleda's exceptional Stun capability shines, with her dodge-counter having exceptionally long invincibility frames.
Qingyi provides 80% Daze Vulnerability-immensely effective for any character. Unlike Lycaon or Lighter's element-specific buffs, Qingyi's debuff works universally, making her a versatile Stun Agent. Any team focusing on Daze burst should include her.

Lycaon feels more like a high-impact Support than a pure Stun Agent. His 30% Ice RES Reduction lasts 30s and triggers via parries or enhanced specials. Crucially, RES Reduction and Daze Vulnerability occupy separate multiplier zones, and few characters reduce RES. Thus, Lycaon carves out a niche in Ice teams.
Lighter, an Ice/Fire hybrid buffer, requires an Attack agent to activate his full potential. His buffs are potent: 75% Ice/Fire DMG Bonus + 15% RES Reduction. He lacks direct Daze Vulnerability buffs but extends Daze by 3 seconds, indirectly enhancing Daze Vulnerability.

5. Zenless Zone Zero Defense Agents
Currently, only four Defense Agents exist: Caesar, Seth, Ben, and the newly released Pan Yinhu. Among them, Ben's mechanics are niche with almost no team demand, while Pan Yinhu is currently bound exclusively to Yixuan-thus we'll skip detailed explanations.
Seth provides 100 Anomaly Mastery and 20% Anomaly Accumulation RES. His strength lies in easy buff activation and Quick Assist responses targeting the previous character, avoiding conflict with Supports' assists. However, the 20% Anomaly RES requires holding basic attacks or chain attacks, and functions as a bonus effect only for same-element/faction allies. Thus, Seth typically serves as an Electric Anomaly specialist or Jian's dedicated partner.

Finally, Caesar-arguably the most familiar support since her v1.2 debut. For just 20 energy, she grants 1,000 ATK + 25% DMG Bonus, massive shields granting Super Armor, and "shield cannot be penetrated" mechanics. These traits made her the definitive sustain safety pick for v1.3's Roguelike mode. Caesar excels through high-value buffs, long duration, and shields enabling stable DPS windows.
Her sole weakness: shields only protect on-field agents. For teams where two characters need field time (e.g., Anomaly comps), Caesar becomes suboptimal. Her buff potency rivals Astra Yao's.

Current combat scenarios split into two types: dps-check stages and survival-oriented stages. The latter imposes heavy survivability pressure but no time limits, lowering DPS requirements. DPS-check stages enforce strict timers-essentially testing execution and character investment. Failing to maximize damage output risks missing score caps. Thus, Caesar and Astra Yao represent two team philosophies: survival vs. aggression. Choosing based on stage requirements remains optimal.
6. Zenless Zone Zero Disorder Agents
introduction needed. Allow me to present the game's most universally compatible character-Piper. If asked "Who is a must-build agent?", Piper tops the list. She is the quintessential "initiator" for Disorder teams. Examining her skills and Mindscape stacks, Piper's value concentrates entirely on boosting Anomaly accumulation and energy regeneration, enabling her to trigger Assault swiftly with simple mechanics.

As the sole A-Rank Disorder Agent, her efficient Anomaly stacking + energy generation and Physical element (ideal for triggering Disorder) make Piper indispensable. Paired with Burnice, they form the classic Disorder core. Combined with Miyabi, she becomes the budget-friendly Disorder trigger. Piper's role mirrors Lucy's-universal support for Disorder teams.
If Piper is the Disorder "initiator", then Burnice is the universal "receptor". As an off-field Fire Disorder Agent, she consumes Ignition Points to continuously apply Fire Anomaly stacks, even off-field.

Tsukishiro Yanagi flexibly serves as support or DPS. She can deal direct damage with two buffers or act as a Disorder trigger-the latter requiring Energy Regeneration on Drive Disc slot 6. Grace, the early-game Electric Disorder carry, can substitute Yanagi but performs suboptimally.

With all support-oriented Agents now covered, we hope this guide empowers your understanding of each character's strengths. May you approach teambuilding for your favorite Agents with more insight, less uncertainty!
Remember: "Teambuilding theory" itself isn't complex-your main DPS will either focus on burst damage or sustained damage. The core lies in comprehending support mechanics to select optimal partners for your primary DPS. Above all, stay tuned for more Zenless Zone Zero guides and new merchdises!
Zenless Zone Zero Official Merchandise
- From $119.90
- From $119.90
- Unit price
- / per
- $129.90
- $129.90
- Unit price
- / per
- $169.90
- $169.90
- Unit price
- / per
- $309.90
- $309.90
- Unit price
- / per
- $29.90
- $29.90
- Unit price
- / per
- $29.90
- $29.90
- Unit price
- / per
- $29.90
- $29.90
- Unit price
- / per
- $14.90
- $14.90
- Unit price
- / per
- $38.90
- $38.90
- Unit price
- / per
- $19.90
- $19.90
- Unit price
- / per
- $19.90
- $19.90
- Unit price
- / per
- $14.90
- $14.90
- Unit price
- / per
- $14.90
- $14.90
- Unit price
- / per
- $35.90
- $35.90
- Unit price
- / per
- $29.90
- $29.90
- Unit price
- / per
- From $29.90
- From $29.90
- Unit price
- / per
- $14.90
- $14.90
- Unit price
- / per
- From $29.90
- From $29.90
- Unit price
- / per
- $69.90
- $69.90
- Unit price
- / per
-
Black Curved Brim
-
Brown Curved Brim
-
Black Flat Brim
- $79.90
- $79.90
- Unit price
- / per
-
Black
-
Brown


